Followers

Sunday, 23 October 2016

Color Splash

Hi crafty people, 
Here I am playing around with the new Itst Bitsy sprays.These are ideal for your mix media, scrap booking projects. These are rich and vibrant in color. I have used few Color Splash sprays for this mix media project. Working with these sprays and whitewash alterable box.


I painted the box with black gesso. These sprays are rich and vibrant even on black gesso.
I have used  modelling paste and chevron stencil to create a wonderful texture on the box lid to give a little dimension. Once dry used Lemon Zing,Hot PinkOcean Mist color splash sprays.


 I used these sprays with crochet lace and they work wonderfully dying the lace trims.


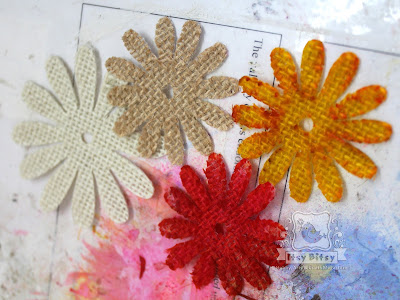
I am amazed at the versatility these sprays have. They remain true to color with even these jute burlap flowers.


Since these react well with water you can use them directly for vibrant color or dilute them with little water for a more subtle shade. You can spray two shades to form a new color. 


Used silicon glue to stick the flowers, lace trim to the box lid.
Also added resin dots I made with Resin and some pearls.


Added quilled fringe flowers along with burlap flowers.


Hope you liked the little color splash ...
Thanks for stopping by and would love to hear from you.

Monday, 17 October 2016

Fun Resin Embellishments

Hey people, I would be playing with Resin today ...
Do u miss adding enamel dots to your projects, now you can make your own sparkle dots, dew drops. Mix resin Glitter dust with Resin and use Toothpick to pour little drops over a plastic sheet. For dew drops just pour clear resin.


Next I played with chipboard designs,iron on stickers,3D stickers to make resin embellishments,stamped images.Any simple sticker/chipboard can be transformed into pretty embellishments.


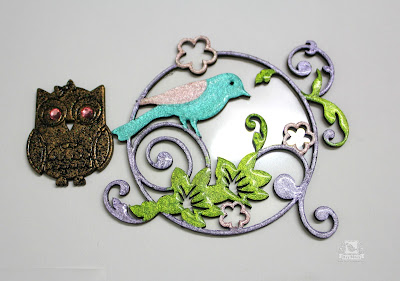
 For these chipboard designs chipboard owl and garden bird chipboard, I painted them with  metallic paints and backed the bird with ohp sheet


Next I made small batches of resin and added different colors of glitter dust for all the small areas of the design. Use toothpicks to pour the resin as the area is very small and more precise coverage.The resin gives a glass like finish. Only important thing is to remove the bubbles (use straw to pop the bubbles)

Next made these little sparkly resin tiles using stickers and chocolate molds and for one tile I inserted a very pretty pink shell .
After the resin cures fully you can remove from the mold and sand the sharp edges using a fine grit emery/sandpaper.


 Another experiment I did was using resin with these iron on stickers.
The left has little glitter dust mixed in resin and the right is the original sticker with silk thread. I love the glass finish and now it can be used as a pendant/key chain(since I added a jump ring before pouring the resin).


Next I stamped the flower image and fussy cut it. The left has clear resin,I totally love the resin rose. You can use it with any of your card making or scrap booking projects.


 And now comes the most adorable part. I took these 3D stickers and since these are in two layers I removed the top and than poured the glitter dust mixed resin for some sparkly stickers. Let these stickers sit on small pieces of foam tape so any extra resin at the edges can be easily removed once dry.


 Layered these birds back to the original bottom layer of the sticker.


 There are endless possibilities with resin. Just play along with any little pieces lying there in your stash.
Hope you liked my little experiments with resin. Do leave some love and do not forget to join our CHALLENGE here.